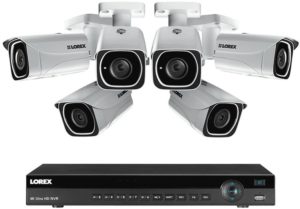
This is my review of the e-mail alert notifications on a Lorex 4K IP Camera System.1
You can configure the Lorex NVR to send an e-mail alert when a surveillance camera detects motion in its field of view. It can optionally include a snapshot, which hopefully shows what caused the event.
Carefully consider whether you want e-mail alerts in the first place. I recommend enabling this feature only for cameras where you don’t expect a motion event. But if you do get one, you want to know immediately. For example, when you monitor your fenced backyard, where only an intruder should cause a motion event.
I also recommend disabling e-mail alerts late at night by using the scheduling feature. An immediate e-mail alert does no good while you’re sleeping. If you want to monitor snapshots from past motion events, consider using the NVR’s FTP feature instead. See my prior post.
The FTP facility might be a better way to review motion events without filling up your e-mail inbox. Depending on your settings, a snapshot is relatively large, being ½ to 1 or 2 Megabytes in size. If you get several e-mails, they require a lot of bandwidth on your cellular service and also storage space on your e-mail server. Plus, you cannot easily suspend these alerts if for example, you plan to mow your lawn.
The e-mail sent from the Lorex NVR uses the Pacific timezone rather than the local timezone already configured. On some e-mail clients, this causes alerts to appear as if they were sent in the early morning hours. In other words they won’t appear in your inbox in order by local time. It’s frustrating because the alert doesn’t appear as the most recent message I receive.
Automation to the Rescue
I manage my own website, so I automated the alert e-mails to reduce their size and send them under my local time zone. I can also easily suspend them. If you have your own website, two simple scripts will do the trick. Here’s how I did it.
Create an E-Mail Account
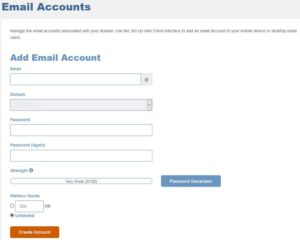
On your web hosting server, create a new e-mail account for your website. You could name it something like “alert@yoursite.com.” Specify a strong password and note the Simple Mail Transfer Protocol (SMTP) parameters required by your hosting provider to send and receive e-mails with this account. You will specify this e-mail address and those parameters below.
Create an E-Mail Filter
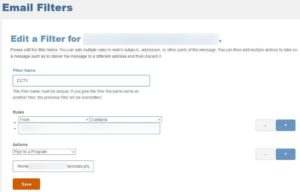
Your web hosting provider should allow you to create an e-mail filter, such that whenever an e-mail is received on this new account, it is not placed in the inbox. Instead it is “piped” to a script, which handles it programatically. I describe such a script below.
Enable Motion Events and Snapshots
I will not repeat the steps to configure e-mail alerts with snapshot attachments here. Please refer to Lorex NVR manual. Or, refer to my prior post on using FTP. Just be sure to check the box for “Send Email” under Event, Motion, Motion Detect in addition to all the other steps to enable snapshots.
Enable E-Mail Notifications
On the NVR, navigate to Network, EMail. Here I show the NVR web interface, but you can use the Flir Cloud Client, or the NVR itself with a monitor or TV. Click the Enable check box to enable e-mail processing.

Now decide which e-mail server to use to send your e-mails. Each time the NVR issues an e-mail, it will log into this e-mail server in order to send it. You can use the Lorex e-mail server. Follow the instructions to do that in the manual. You can use your personal e-mail account, like Google GMail or Microsoft Outlook. Follow the instructions provided by those facilities. Note you may need to enable less-secure log in capability on your personal e-mail account. Otherwise the server might not allow a log in from the Lorex NVR. Your third and final choice is the e-mail account you created above at your web server.
The Lorex account may be the best choice. With it, you don’t have to worry about the storage of sent e-mails. If you use a personal account like GMail, each time the NVR sends an e-mail, GMail will store what was sent in your “sent” folder. Likewise for e-mail sent via your web server account. Although you’ll have a record of what was sent, you should periodically delete those e-mails to avoid using excessive disk space. Another consideration for the Lorex server however, is Lorex will have access to your snapshots. It is unknown what they may do with them.
Fill in the fields for SMTP server, SMTP port, and Encrypt Type as described by your e-mail server documentation. Enter your username and password. They are used by the NVR to log into your e-mail server. “Sender” is the e-mail address from which the alert will appear to originate. I use my personal e-mail address for that.
The “Receiver” field is the e-mail address of the account you created at your web server to receive each e-mail alert sent by the NVR. In this example, that would be “alert@yoursite.com.” When the alert is received at your web server, it will be handled by the e-mail filter you created above.
When you configure a motion event to send an e-mail, a snapshot is optional. If you don’t check the box to enable a snapshot and choose which camera or cameras to take a snapshot, then you won’t see a snapshot in the alert e-mail.
You will likely want camera 1 to take a snapshot if there is motion detected on camera 1. You can also cause other cameras to take snapshots when there is motion on camera 1. If you do, you will get separate alert e-mails, each with a single snapshot rather than one e-mail with multiple snapshots. Suppose you choose cameras 1, 2 and 3 to take a snapshot when motion is detected on camera 1. You will get three alert e-mails, and each will show the alert came from camera 1. One e-mail will show the snapshot from camera 1, another the snapshot from camera 2, and another the snapshot from camera 3.
Automated Script
When my Lorex NVR sends an alert e-mail, it is received at the e-mail account I created at my web server. The e-mail filter I created “pipes” the message to my script, which reads and processes the e-mail. It first saves the attached full-size snapshot to a directory on my server. It also creates a thumbnail of the original snapshot. Finally it creates a new e-mail, which it sends to my regular e-mail account. I can include other recipients as well to broadcast the same alert to different people.
This new e-mail has the thumbnail image, as well as the pertinent information about the motion event like channel (camera number) and the date and time it occurred. It effectively “forwards” the alert, but it is a new e-mail and not actually a forwarded e-mail. This solves the problem of alerts appearing out of order in my inbox.
Due to the small thumbnail image, the “forwarded” alert I receive at my personal e-mail account is relatively small compared to the original snapshot. That solves the problem of huge bandwidth with the original Lorex NVR alerts.
The thumbnail is a link to the original image stored on my server. So if I see something suspicious, I can click on it. That opens my web browser and displays a web page. That page in turn is generated by a second script, which simply displays the original snapshot image. Most motion detection events can be dismissed just by looking at the thumbnail. There is usually no need to see the full-size snapshot.
Viewing the Original Snapshot
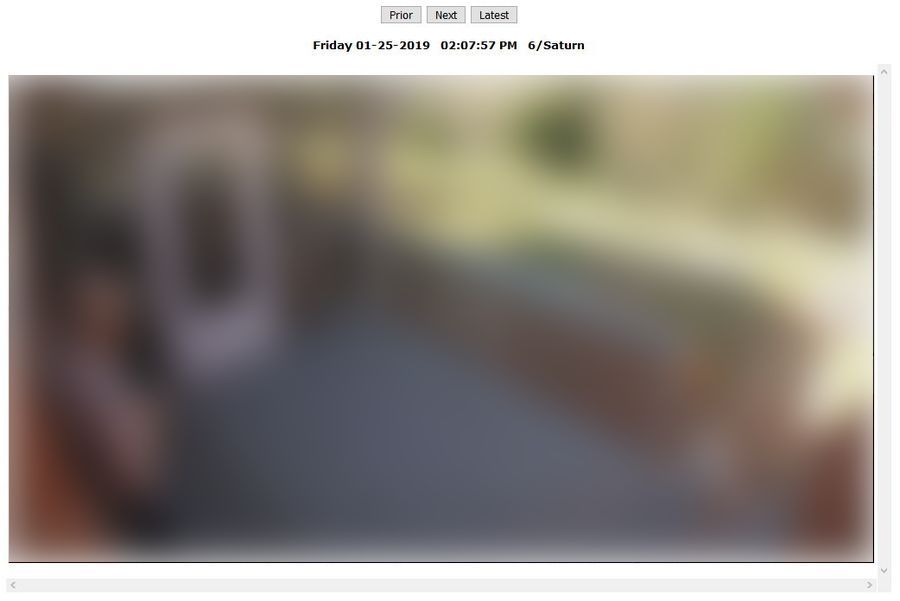
Here is the web page I see when I click on the thumbnail in my “forwarded” alert e-mail. The image is blurred here for privacy, but it’s the original snapshot image, scaled down somewhat. I can click on it to enlarge it to full size if necessary.

The date and time when the motion event occurred is shown along with the channel (camera number) and camera name. This is parsed from the original snapshot’s file name, which gives the channel, year-month-day and hour-minute-second:
ch01_20190103_152715_E.jpg
I have other buttons on the page to view the prior or next snapshot. They simply submit a request to my script to display either the previous or the next image, in order by timestamp. A third button requests the most recent snapshot processed. So from any given alert e-mail, I can review all the snapshots that have been processed.
The final step for my e-mail processing script is to periodically delete snapshots from the server. It deletes snapshots over a week old to free up disk space on the server. That gives me enough time to review the alerts before they’re deleted.
Suspending Alerts
When I want to suspend alerts, I send an e-mail to the same “Receiver” address to which the NVR sends alerts. The subject of the e-mail is a command for my script, like “Set Motion Off” or “Set Motion On.” The script sets a flag to enable or disable forwarding subsequent alert e-mails. When alerts are suspended, the script continues to save the snapshot attachments it gets. It simply does not “forward” them to my regular address. That way I can go back to review any snapshots I missed. For instance I’m not bothered by dozens of e-mail alerts when I’m out mowing my lawn.
Conclusion
The e-mail alert feature of the Lorex NVR may be useful under certain conditions. If you do enable it, consider pre-processing the snapshots using your website’s e-mail filter and scripting facilities. Store the original snapshots at your web server and send new e-mails with just thumbnail images. That saves bandwidth and resources on your regular e-mail account and ensures you see your messages in the order they are received. A link to a simple web page can show the original snapshot if needed.
Technical pointers: I wrote my scripts using PHP. I used “mailReader” to parse the original e-mail alert sent from the NVR to my e-mail account at my web server. I then used the “PHPMailer” class to send alert e-mails from my script to my personal e-mail account. Both are excellent pre-made scripts that handle the detailed processing.
UPDATE: The scripts I describe in this article are now available for download. See How-To: Home Automation Scripts.
Footnotes:- Specifically I have model 4KHDIP86, which is described as “4K Ultra HD IP 8 Channel NVR System with 6 Outdoor 4K 8MP IP Cameras, 130FT Night Vision, 2TB Hard Drive.” The Network Video Recorder (NVR) is model NR908X, or specifically NR9082 with the 8-channel configuration. [back]


Is there a way to see the thumbnail on a push notification to your cell phone?
The notification e-mail contains the thumbnail, which you should be able to see on your cell phone.