After years of higher priority projects (i.e., procrastination), I finally built a workbench for the garage. Linda got me going with an offer to buy me the lumber as a Christmas present. I decided on the plank-top workbench featured in ShopNotes magazine, Issue 75, May/June 2004. This turned out to be an exceptionally sturdy workbench for only about $100 in materials.
I’ll provide some recommendations based on my experiences building this workbench. Therefore you’ll want to refer to the plan in the ShopNotes article referenced above to know what I’m talking about.
It took me a while to get started because the plan doesn’t call out the actual boards you should purchase. It only gives the finished dimensions of the pieces. This is unfortunate because after a while I realized the designer obviously had certain lumber in mind. The cuts all seem to work out and you can reuse some of the waste on other parts of the bench.
I purchased four 2x4x8’s for the legs. Each results in two halves of one workbench leg. I used regular number 2 construction grade boards. However I recommend getting a better grade, like Douglas fir, for the legs. Regular 2×4’s will have a slight bow in the middle that makes it difficult to glue the two halves together. Each half must be 1-1/2 inches thick to make a 3 inch square leg. That doesn’t leave any room to plane or rip warped areas.
You need one 2x6x8 for the rails in each of the two leg assemblies. There are two top stretchers and two bottom stretchers, requiring four 2x6x8’s. If you can pick out some decent boards at your local home store, you may be able to get two of the three cross rails out of the 2×6’s you cut for the rails. I happened to have some scrap 2×6 stock for an extra cross rail. Otherwise you might need an extra 2x6x8 for the cross rails. Altogether you’ll need six or seven 2x6x8 boards.
You’ll be able to use the scrap left over from your 2×6 cuts to make the cleats for the bottom shelf. For the shelf itself I bought four 1x6x8 boards.
The top requires three 2x10x8 boards. For these you’ll want to be very selective at your local home store. I tried to get the straightest boards I could find, without any knots, or at most, with minor knots. The selection is usually terrible. I went back on a subsequent occasion to get the last of the three boards. Sometimes they get a new shipment and you might find one board you can use.
Another recommendation on the top planks is to look at the end grain of each board you pick. Try to pick boards that will warp the least. I won’t explain it here, but any good woodworking reference book will explain how boards cut from various parts of the tree will shrink or warp differently over time. Try not to get boards that will bow or cup. A little warping along the length of the board can be corrected when you screw it to the top of the workbench. I used some clamps to bring the board in line as I sunk each screw.
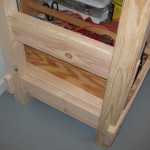
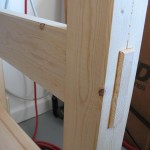
Construction was straight-forward, especially with the tools I have. For instance the legs and rails are joined with mortises and tenons. The mortises were easy to make because you only cut half-laps on two pieces of wood and then glue the halves together. I don’t have a dado blade so it took me a lot more cuts on the table saw to do all the half-laps and tenons. I also used a circular saw to cut half-laps on the stretchers since my table saw setup cannot support a board 90 inches long.
In the plan the middle rail is supposed to be 8-3/4 inches from the top of the leg. I think this is a typographical error because the picture shows it midway between the upper and lower rails. Also I’m taller than average, so I also made the legs 37 inches high instead of 34-1/2. My bench is thus 38-1/2 inches high with the top planks. I adjusted the plan to center the middle rail appropriately and kept the bottom rail 4 inches off the ground.
Another gotcha to look out for is cutting the tenons on the upper rails. The text says to cut all the tenons the same length on all rails. I got carried away and did all the rails the same. However you shouldn’t cut the shoulder on the top side of the top rail tenon. This allows the workbench top to rest on solid wood. On my bench there’s a 1/4 inch gap in the top of each leg. It turned out alright though because there’s still enough support surface and no screws go into that area anyway.
Speaking of attaching the top planks, the design says to offset the outer row of screws that hold the front and back planks. Otherwise these screws would hit the lag screws in the top stretchers that attach to the legs and cross rails. Unfortunately, you won’t get a neat-looking, straight row of screws on the top planks. It’s a minor detail, but the design doesn’t take into account overlapping the plank-top screws with the cross rail lag screws very well.
This was a fun project to build. They say it can be done in a weekend. I say it depends on your skill level and the tools you have. If you have a dado blade and proper outrigger support on your table saw, it will go faster. I only have enough clamps to glue up one leg at a time, then one leg assembly at a time, and so on. A planer would also help get your boards to the right dimension so you don’t have to deal with warped boards.
Of course every workbench needs a good vice. I got a new Wilton 5 inch vice to top it all off.
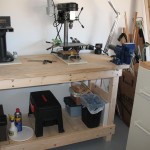
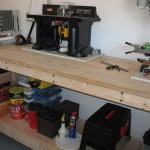
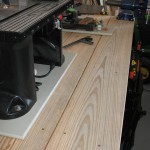
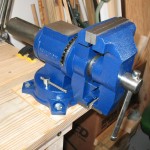
Like the workplace adage about a project expanding to fill the time allotted to its completion, having a workbench enables you to complete more ambitious projects more quickly and easily.
I’m having reservations about the main feature of my plank-top workbench, the plank-top. The eighth-inch gap between planks lets sawdust and debris fall below. I may screw a one-inch strip of hardboard along the gap underneath the top, then use the shop vacuum once in a while.
The planks also tend to cup (warp) and this leaves a non-level surface. This is a hindrance when you want a flat surface for assembling a workpiece. When you lay a screwdriver down in the wrong place, it has a tendency to roll off the top.
Although I did consider the drawback of having a gap before starting construction, the plank warping is another story. I may replace the planks with two sheets of 3/4-inch plywood glued one on another. Does anyone have other ideas?